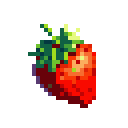
In game development, creating a single pristine sprite is only step one. Production requires iteration: you need three tiers of armor for your protagonist, five variations of a base NPC, and multiple upgrade states for a weapon.
Doing this manually is incredibly time-consuming. However, using standard text-to-image AI to generate variations usually results in a completely different character, breaking your game's visual consistency.
pixie.haus solves this through specialized Image-to-Image (I2I) AI pipelines. By feeding an existing sprite back into the diffusion model alongside a new prompt, you can engineer structural and thematic changes while strictly preserving the underlying pixel architecture.
Here is how to effectively edit pixel art with AI on our platform.
1. Manual Tweaks vs. AI Iteration
Before spending compute credits on an edit, it is important to identify the scope of the change you need.
-
The Built-In Manual Editor (0 Credits): If a generated sprite is perfect except for a single stray red pixel on the cheek, or you simply want to flood-fill a blue shirt to make it green, use the free web editor. It provides basic line-drawing and color-picking tools designed for rapid, manual micro-fixes.
-
The Image-to-Image Pipeline (10–30 Credits): If you need structural changes—such as turning a peasant's tunic into plate armor, changing a character's pose, or transforming a basic iron sword into a glowing magical weapon—you must use the I2I pipeline. This forces the AI to recalculate the grid geometry based on your new instructions.
2. The Compute Roster for Editing
Not all AI models are capable of processing image inputs. For the Edit pipeline, we restrict the roster to highly intelligent architectures that can mathematically balance an existing image against new text instructions.
-
Flux 2 Dev (10 Credits): The production workhorse. It offers an excellent balance of retaining the original image's "DNA" while injecting the new features you request.
-
Grok Imagine (15 Credits): Highly effective for spatial edits. If you need to change what a character is holding or alter their physical proportions while keeping the art style intact, Grok excels at spatial reasoning.
-
Google Nano Banana (30 Credits): The absolute highest tier of instruction adherence. If you have a complex request—such as "keep the character's face exactly the same, but change their armor to futuristic cyberpunk gear"—Nano Banana provides the most precise logical adherence.
3. Core Use Cases for Game Developers
The image to image AI pixel art workflow unlocks several massive shortcuts for indie developers:
Asset Variations (The "Palette Swap 2.0")
In the 16-bit era, developers created enemy variations by simply swapping the color palette (e.g., a green slime vs. a red slime). With I2I, you can swap themes. You can take a base "Goblin" sprite, run it through the edit pipeline, and generate a "Goblin Archer," a "Goblin Shaman," and an "Armored Goblin Boss"—all retaining the exact same base proportions and posture.
Equipment Upgrades
If you have a base character sprite, you can use I2I to generate their progression tree. Start with the base sprite, add "holding a wooden shield" to the prompt. Then run that result back through, changing it to "holding an iron shield."
Fixing Algorithmic Hallucinations
Occasionally, an AI will generate a flawless character with a completely mangled hand or weapon. Instead of throwing the asset away, load it into the Edit pipeline. Keep your original prompt, but explicitly emphasize the corrected anatomy in the text. The AI will use the pristine parts of the image as an anchor while recalculating the flawed geometry.
4. The Logic of Editing: How to Prompt
The most common mistake users make with Image-to-Image AI is treating the prompt box like a chat interface.
If you upload a picture of a warrior and want to give him a helmet, do not simply prompt: "Add a red helmet."
Diffusion models do not "add" things; they recalculate the entire canvas based on the reference image and the text. If your prompt is only "add a red helmet," the AI will attempt to turn the entire image into a red helmet.
The Golden Rule of I2I: Describe the entire final image you want to see, utilizing your original prompt as the foundation.
-
Original Prompt: "A medieval warrior, leather armor, holding a sword, isometric perspective, 16-bit."
-
Correct Edit Prompt: "A medieval warrior, wearing a horned steel helmet, leather armor, holding a sword, isometric perspective, 16-bit."
By keeping 90% of the prompt identical and injecting the new variable, the AI understands exactly which parts of the original image to preserve and which pixels to mutate.
5. Ensuring Chemical Cohesion: Color Palettes
When you alter a sprite using AI, it will naturally try to introduce new colors to render the new elements (like the steel of a new helmet). If left unchecked, this will break the color limits of your original sprite.
To prevent this, always apply the exact same Lospec palette during the editing process that you used for the original generation.
By clamping both the original generation and the subsequent I2I edits to the exact same curated hex-code list, the new pixels will chemically match the old pixels. The resulting edited sprite will look as though it was hand-drawn by the exact same artist, ready to be deployed directly into your game engine.