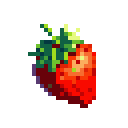
Generative AI is a powerful tool for macro-abstraction, but at the micro-level, diffusion models occasionally make mathematical errors. Because they calculate images probabilistically, an AI might place a stray blue pixel on a character's cheek, misalign a sword's hilt by one grid space, or leave a tiny gap in a black outline.
In high-resolution digital painting, minor errors are invisible. In pixel art, a single misplaced pixel can ruin the readability of the entire asset.
To solve this, developers traditionally have to download the generated image, open external software like Aseprite or Photoshop, fix the error, and re-export. This creates massive friction. To eliminate this workflow bottleneck, pixie.haus features a fully integrated online pixel art editor.
Here is how to utilize the native editor to refine your AI-generated assets rapidly.
1. Scope and Philosophy: A Zero-Friction Tool
It is important to state what the pixie.haus editor is not. It is not a replacement for dedicated, heavy-duty software like Aseprite. It does not feature complex layer blending modes or timeline animation curves.
Instead, it is engineered for rapid iteration and immediate deployment. It provides exactly the tools you need to fix AI hallucinations without ever leaving your browser.
Furthermore, using the manual editor costs 0 credits. You can spend hours tweaking pixels, flood-filling colors, or drawing assets completely from a blank canvas without deducting anything from your account balance.
2. The "Last Mile" Cleanup Workflow
The most common use case for the editor is bridging the gap between a 95% perfect AI generation and a 100% perfect, game-ready sprite.
Once an asset passes through our generation pipeline and is saved to your library, you can instantly open it in the editor to perform structural cleanup:
-
Orphaned Pixel Removal (The Background Check): Even with aggressive background removal, the AI may occasionally leave behind "jaggies" or nearly invisible, light-colored pixel clusters. Press B on your keyboard to toggle the editor's background color. Checking your sprite against multiple contrasting backgrounds instantly reveals stray pixels, allowing you to use the Eraser (E) to perfectly clean the alpha channel.
-
Outline Connection: If you are enforcing a strict black outline style for your game, the AI might occasionally leave a 1-pixel gap. Hold Alt/Option + click to instantly select the exact outline hex code via the Color Picker, switch to the Pencil tool, and manually close the gap to ensure engine-ready readability.
-
Fixing Hard Edges: Need to fix a rigid weapon handle or the edge of a building? Hold Shift + click while drawing to force the pencil tool to draw perfectly straight lines, bypassing the need to click pixel-by-pixel.
3. Manual Palette and Shading Control
While our platform uses Lospec palette clamping to aggressively quantize colors, the AI ultimately decides where to place those colors. Occasionally, it makes illogical shading choices—such as putting a dark purple shadow in a brightly lit area.
You have total manual control over the color logic within the editor:
-
Rapid Flood Fill: If you want to change a blue tunic to green, you don't need to repaint it. Select your target color and hold Cmd/Ctrl + click to instantly Flood Fill that specific area.
-
Manual Color Reduction: Sometimes the AI uses two slightly different shades of grey where one would suffice. You can manually optimize the sprite's palette by dragging and dropping one color onto another in the palette panel. The editor will automatically replace all instances of the dragged color with the target color on the canvas, instantly reducing your color count and unifying your asset.
4. Essential Editor Shortcuts
For rapid iteration, the editor is built entirely around hotkeys. Keep one hand on the keyboard to speed up your workflow:
-
Cmd/Ctrl + Z / Y — Undo / Redo
-
Cmd/Ctrl + click — Color fill (Flood Fill)
-
Shift + click — Draw straight lines
-
Alt/Option + click — Color picker
-
+ / - — Change brush size
-
B — Toggle background color (crucial for checking transparency)
-
G — Toggle pixel grid overlay
-
1 – 8 — Quick select colors from your active palette
-
E — Eraser (switches to transparent color)
5. The "Programmer Art" to I2I Pipeline
Because the editor allows you to create art from scratch for 0 credits, it unlocks a highly efficient workflow for developers who lack traditional drawing skills.
Instead of trying to force a text prompt to understand a highly specific, complex pose, you can:
-
Open a blank canvas in the editor.
-
Use the Pencil tool to draw a crude "stick figure" or block-out silhouette of the exact pose and proportions you need (classic "programmer art").
-
Save the crude sketch to your library.
-
Send that sketch to the Image-to-Image (I2I) AI pipeline.
By applying a descriptive text prompt (e.g., "A heavily armored space marine, holding a plasma rifle") to your manually drawn block-out, intelligent models like Flux 2 Dev or Grok Imagine will use your crude sketch as structural scaffolding. The AI will seamlessly render the shading, texturing, and details over your custom pose, turning a zero-credit doodle into a production-grade asset.
6. Seamless Cross-Service Integration
The greatest advantage of the built-in editor is its tight integration with the broader pixie.haus ecosystem.
When you finish tweaking a sprite and click save, it updates directly in your library. From there, the pipeline remains unbroken: you can immediately click that newly perfected sprite and send it straight to the Animation tab. By utilizing the editor to ensure the baseline static frame is structurally flawless, the subsequent temporal math calculated by models like Seedance or Pixie-Spritesheet will result in a perfectly clean, looping animation for your game.